Monday, February 26, 2018

Macrame

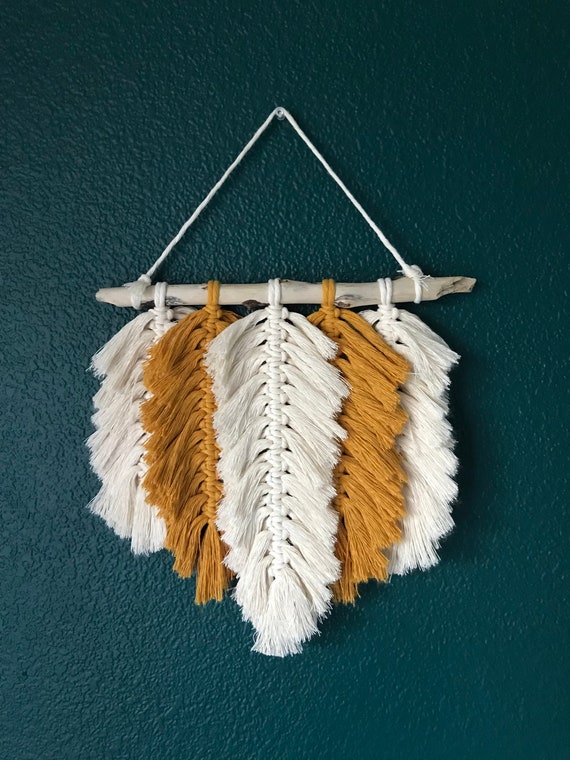
Macrame! A great way to add boho or retro elements to your home! I love the idea of a huge wall hanging above the bed (especially like the one below on a dark wall!). I would love to make one! But also love the more simple versions of a door curtain.. But I might start with a smaller project like some jewellery or planters..

Wall hanging! Love love love! Great with the dark wall!
Wall hanging- with instructions! Good starter..
Wallhanging- DIY instructions

Wall hanging
Wallhanging- Etsy
Wallhanging- Etsy
via- 3 knots instructions
Easy door curtain- with instructions!
Via- Instructions
Macrame curtain- love this!
via or etsy
via
via
Asymmetric

Video Tutorials:

YouTube Tutorial
Youtube Tutorial

Other inspiration:

Beads and Macrame wallhanging
Beads and Macrame wallhangings

Yarn
Room divider
via
Macrame Tablerunner- instructions!

An easier option would be an assemblage of dreamcatchers made from doilies.. Also a recycling project!

Saturday, February 24, 2018

Em's Bedside Tables

 
We bought a second hand bed for our spare room, along with bedside tables and a tallboy. However, the furniture was ugly pine coloured so in need of some funking up. A great excuse to try some distressed techniques. I sanded back the bedside tables, which didn't take as long as I thought using an electric sander! Then I dry painted the fronts of the drawers blue, mixing my own colour with acrylics. Next I whitewashed the rest of the bedside table by mixing the white waterbased paint with some water. Afterwards I dry brushed over the whole bedside table including the blue drawer fronts.

I wanted some funky ceramic knobs and saw this tutorial to decoupage wooden ones with their free downloadable designs. They turned out fantastically! I love the designs and after spraying with a high gloss finish could almost pass as ceramic anyway but way cheaper! Since they are in the spare room they won't get a lot of use anyway so wearing out isn't an issue but I think the gloss would protect it well.


SaveSave
SaveSave

Tuesday, November 7, 2017

Em's Mosaic Lounge


My Mother-in-law has always wanted to build a lounge form hebel (aerated concrete) and mosaic it. So when she got a whole heap of hebel blocks as seconds and my husband designed the way to build it, her dream came true! We helped, laying the blocks down like brick layers (I thought it was fun) to create the box shape, and using all the blocks we had! Then came the fun part of shaping it. Using files, chisels, angle grinder, and sand paper it came to shape, and actually looks comfortable and cute. The next step was mosaicking! We left that to her to conquer, taking a few years to get to the finished result using different coloured and sized stripes.


Building it up brick layer style


Angle grinding is duty work
Almost there 

The finished shape before mosaicking

Friday, July 14, 2017

Em's Rubik's Cube Tissue Box Cover


I saw this idea on Pinterest a while a go and have wanted to make it for our spare room for ages. So finally decided it could be my holiday project these holidays. I realise it is a popular idea as it is featured in The Big Bang Theory TV show, however I am not into the show at all and just thought it was a clever idea for a square tissue box cover. I have now thought of a few other ideas such as a liquorice all-sort or video game motifs, using the same technique. You could also use the same technique for coasters.

Using plastic canvas from an art shop, I just measured a tissue box and made my squares to fit. Annoyingly I couldn't fit all sides onto one piece of plastic canvas! And had to buy another piece for one square! Then embroidered two lengths of yarn to create the coloured squares. I wasn't too fussed about the order, however kept the colours pretty even. It isn't technically solvable, which is a bummer. (Same colours can't be next to each other on an edge) Next time I would make it solvable by refererencing a real Rubik's cube. The hardest part was outlining it all in black. It took the longest, having to thread each hole, which had already been threaded!

All-in-all it was a simple project that didn't take too long and looks great! I already have people wanting one for Christmas!

Video tutorial


Pattern from Pinterest- I didn't follow this but could be good